Dropfiles: Common Use
The main idea of Dropfiles is to set display parameters, size, and file format allowed in the component then manage files and categories directly from articles or any WYSIWYG editor. Dropfiles works on every Joomla WYSIWYG editor, both for frontend and backend. For example you can use it in a custom Joomla module.
1. Manage files from article
When Dropfiles is installed you have an editor plugin that is displayed bellow your editor. Click on it to open the main Dropfiles manager view.
It's exactly the same interface as if you're loading the component view using the menu Components > Dropfiles
From the interface you got the category management on the left part, your files on the center part and the files and category settings on the right part.
2. Manage file categories
In order to create a category, click on New category in the left column
To order the categories you can use drag’n drop feature by clicking on the left "folder" icon and moving it. Navigate it up and down to order the categories or from left to right to define category levels (category or subcategory)
The category accordion manager can be expanded all sub-categories or collapsed using a global parameters. To change the state you can click on the > icon on the left side.
On the right side of the screen you can see category and theme options of the theme.
You can define a theme per category or setup a default theme for all the categories from the Dropfiles settings > Main settings > Frontend tab. In order to do that, you should use the parameter Load theme in category:
Depending on the theme you’ve selected you have some displayed options. It helps to show or hide some of the theme elements on frontend simply using toggle button, for example display/hide file size, file hits number...
Once you’re done with the category parameters, you can click on Save settings button at the bottom of the right column to save the theme preference.
If you've chosen to setup the category theme parameters in the component options you'll find the same settings at menu Components > Dropfiles > Options > Themes
3. Manage files
To add files in a category, you can drag’n drop files in the center part or click on Select files button
Then select one or some files to upload. The uploader is HTML5 powered so you can send big files they will be uploaded.
File ordering and filtering
A file ordering can be done using drag'n drop, just drag the file on the dashed line to define it's a new position in the file category.
You can also order all the files from a category or by clicking on the column title then save the ordering. For example, here I've ordered files by size. Once you made the ordering you’ll at the right side, in category options the Ordering fields become blue.
You have also the option to click on the column title to order file by:
- Type
- Title
- File size
- Date added
- Date modified
- Version
- Hits
The column top right option checkbox helps you to clean the backend interface to focus on the main files parameters you have; ie show only file title and version for example.
File multi-categories
Add files in your content
Finally, in order to insert a file category in your editor, click on Insert this category button in the right column.
File category will be materialized in your article by a grey area with a Dropfiles icon.
Already done, you’ve added your first Dropfiles category!!
The first time you insert your category, save your article to see the result on frontend. To open again the category and reload the configuration you’ve done, click on it and click back on the Dropfiles button or double click on the grey area.
Pagination for file listing
Additional options are available, like file pagination. If you have a massive amount of files you can add pagination so that your Joomla content loads faster and is easier to digest for your readers.
File pagination can be enabled and configured from the Main settings > Frontend tab.
4. Copy Cut Paste files
Once a file has been uploaded to Dropfiles, you can select the file by clicking on it. You can also select several files by maintaining Ctrl (on Windows/Linux)/Command (on Mac).
The first method to move or copy files is to use drag'n drop. Drag'n drop alone will move the file, drag'n drop + Ctrl (on Windows) or Command (on Mac) will copy the files.
You can also use the buttons above the file list.
5. Manage single file
Manage a single file has never been as simple as a click on a file, then the file option will be loaded at the right side.
Dropfiles allows you to define:
- File publication state
- File title
- Description: HTML editor can be activated through an option
- File date of creation
- File date of modification
- File publish up and down
- File version
- File hits
- File tags (used i the search engine)
- Custom icon: will see if the option is enabled
- File direct link: be copied easily by clicking on copy button.
- Single user file view: select multi/single user(s) that will be able to view the file
- File new version upload: upload a new file version and keep all file information in old versions.
To add a single file, not a category, simply click on it then insert this file to add it in your editor.
From now on, you can override the single file layout, please go to Dropfiles Tips & Tricks documentation here
And each files has its own direct link which you can use to share easily. You can find the URL at the bottom on the right panel.
6. Update a file
In order to update a file, open Dropfiles, click on the file of your choice, then use the Send a new version bloc to replace the file.
You can change file format, size or whatever, all will be detected and updated. You have also a file version history manager so you can download and restore an old file version.
7. Remote file download
The remote download is the possibility to add a distant (not hosted on your server) downloadable file among others. It has to be activated through the component configuration.
Once it's activated a new button called Add remote file will be added. Then you need to define a title, a remote URL (the link to the file); e.g: https://www.mywebsite.com/file.zip and a file format (to apply the proper icon to the file).
Once the file is added, you can edit all its information like any other files.
8. Email notifications
This feature helps your users know if any changes or actions has been made on your files. There are 3 main parameters for notification:
- Notify category owner: the user owner of the category that contains the file will be notified
- Notify file owner: the user owner of the file will be notified
- Notify Joomla super admin: users in super admin group will be notified
Users and/or admin will receive a notification email if a file is added, edited, deleted or downloaded. Each type of notification can be activated separatelly. and you can add several custom emails.
There are some supported tags you can use in the Email content: {category}, {receiver}, {username}, {uploader_username}, {website_url}, {file_name}. The Email content is only some HTML, you can create your own if you want.
9. A custom icon on files
You can replace the file default icons by your own (PDF icon by a document preview for example). First, you need to enable Custom icon feature from the Dropfiles options.
Next, in the Dropfiles component, click on a file to change its icon. At the bottom right panel, you can select an icon you like from your images.
Or upload a new one.
10. File category multiple & selection download
First, you need to enable Download category parameter in Configuration > Main Settings > Frontend tab.
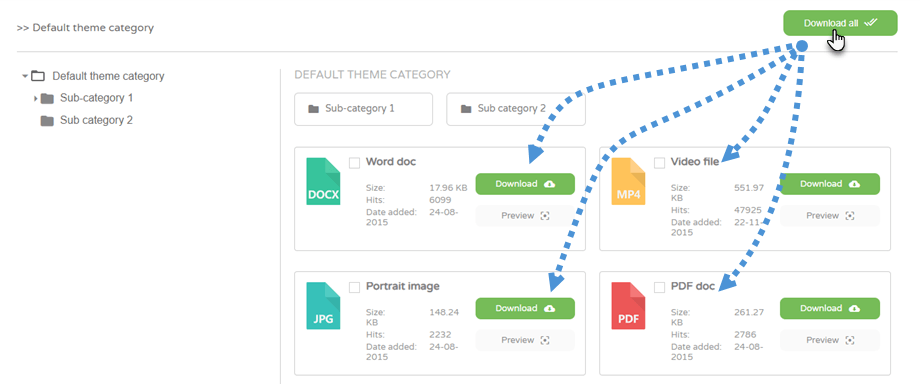
Then you will see Download all button above each category in the frontend.
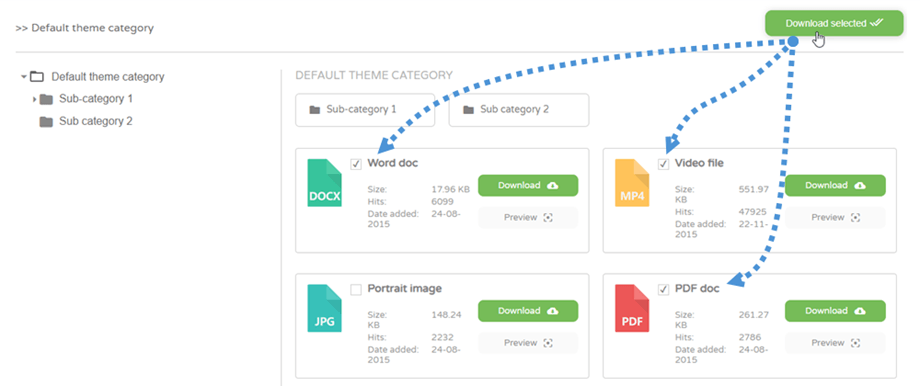
Moreover, you can also select several files, then click on Download selected button.


